|
Color Menu |
  
|
|
Color Menu |
|
Watch the Editing a 3D Floorplan online video.
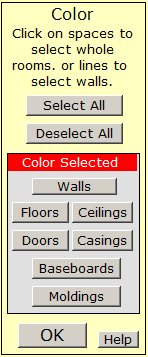
The Color Menu is used to apply colors and textures to the elements of your plan. The first step in using the menu is to select the parts of the model that you wish to color. Clicking the Select All button will select the entire plan, but it is unusual to use this button. More often you will select the parts to color by clicking on the floor plan. Clicking within a room on the plan causes all of the parts in that room to be selected. Clicking in the same room again will deselect the parts in that room. To select a single door, window or wall, click on that element in your plan. To deselect all parts, click the Deselect All button.
To select the outside walls of a plan, click outside of the outer walls of the plan.
Once the desired portion of the plan has been selected, use the other buttons in the Color Menu to set the desired colors/textures. For instance, clicking the Walls button will allow you to set the color/texture to be applied to the currently selected walls using the Color Selection menu.