|
Watermarking Pages |
  
|
|
Watermarking Pages |
|
Watch the Pages and Print Options online video.
A transparent line of text can be repeatedly applied over the whole of your PDF files. This is used to protect your designs from being misused by customers who might want to shop it around to your competitors.
Watermarking can be turned on in the Print Options menu, where you will also find a Setup Watermark button that displays the menu below:
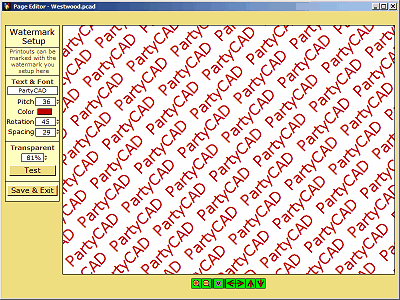
The panel at the left in this specialized menu works much like those described in the Page Editor topic:
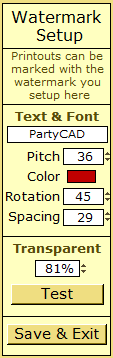
Text & Font - click this box to go to the Text Editor, where you can type the word or words to be used in watermarking your PDFs. If you want the smallest possible PDF files, use the Verdanna font. Most other fonts require font data files to be added the PDF file, and this can increase its size considerably.
Pitch - drag on this box to increase or decrease the size of your text.
Color - sets the color of your watermarking text. You will want to fool around a bit with this, but one idea is to select a dark color and use a high transparency value.
Rotation - this value rotates the lines of text that make up the watermark
Spacing - this controls the amount of spacing between successive lines of watermark text
Transparent - sets the transparency value for the watermark text. A higher value makes the watermark more transparent. If you set this value too close to 100% you will not be able to see the watermark at all on your PDFs.
Test button - generates a sample watermarked PDF page. Once you get close to what you want, make sure to print this to a printer to see if it as effective on paper as it is on the screen.
Save & Exit button - saves your watermarking settings and returns you to the Print Options menu.