
*
Previewing PCAD Files
The ability to preview .pcad files was added to PartyCAD 12 on July 14, 2013. If you installed PartyCAD before that date, you will need to reinstall to take advantage of this new feature. See How to Reinstall PartyCAD
Previews are little thumbnails that allow you to see what is in files without actually opening them. This is a capability I have wanted to add to PartyCAD 12 for some time, but it was only recently I met a man who knew enough about Windows to make it happen. His name is Alexey Novokreschenov, and what you see below would not be possible without his dedication to cracking the problem.
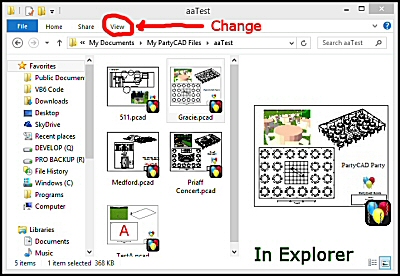
When you browse for files from your desktop, you are using File Explorer or Windows Explorer, depending on your version of Windows. By default you will see lists of files, but you can change to showing previews by clicking View at the top of the window. This opens a ribbon where you can select the size of the previews and whether you want a preview pane to be displayed. There are many other options as well.
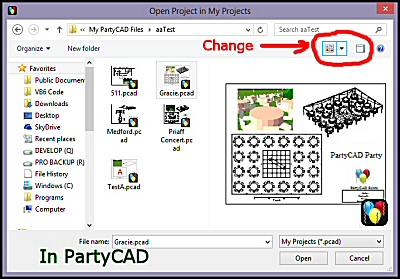
Within PartyCAD, the file browser looks a little different, but you can do much the
same thing. By default you will see lists of files, but you can change to showing
previews by clicking buttons at the upper-
Improving Older Thumbnails
You may notice that previews for your older projects do not look quite as nice as those you have produced more recently. This is because, as of version 12.2.235, PartyCAD began saving a larger thumbnail when you save a project. If you would like to give an older project a nice new thumbnail, you need only load and resave the project. One quick way to do this is as follows:
- Using Windows, browse to the folder containing your PartyCAD files. Usually this is in your documents folder, in a subfolder called My PartyCAD Files.
- Double-
click the project for which you want to a nicer icon. The Page Editor opens to display the project. - Press the spacebar on your keyboard to mark the page as having been changed.
- Close the Page Editor window, clicking Save when asked to do so. The page is saved and the new icon is then displayed in Explorer.
| Documents |
| Videos |
| Requirements |
| Licensing |
| Pricing |
| Purchase |
| Owner Info |
| Problems |
| FAQ |
| Videos |
| Help File |
| Resources |
| Online Update |
| Install/Reinstall |
| Contact |